
What does it take to get your kitchen remodeled by a contractor? What are the steps to remodel a kitchen? Unless you’ve been through the process, you might have absolutely no idea how projects like this proceed. Below, we’ll break down the typical steps and phases for a kitchen remodel project so you can make plans for yours!
Plan Your Budget and Design Your Kitchen
The very first thing that you will do when remodeling your kitchen with a contractor is figure out your budget and the design of your new kitchen remodel. Budgeting and design generally happen around the same time, but having a rough estimate of your budget is important before you start designing. Of course, contractors will help provide you with estimates for the project, but it is a good idea to have some idea of what you are willing to spend before you even meet with your contractor.
How do you know how much you should budget for Atlanta kitchen remodeling? In the United States, kitchen renovation costs range between $4,000 for minor remodels to $50,000 or even more for a major kitchen remodel, with the average being $22,129. A general rule of thumb when figuring out your kitchen remodeling budget is that you should save enough money so that you are prepared to spend between 5 and 15 percent of the value of your house. That means if your home is worth $200,000, you should expect to spend about $20,000.
After you have your budget, you can start to design your kitchen. Sometimes this will happen just with you and your contractor or their team, but you may also decide to hire a separate kitchen designer to help with this part. Of course, hiring a designer in addition to a contractor does require spending a little extra money, but it can also be really helpful to clarify your ideas and to implement them effectively.

When designing your kitchen, you will choose everything that you want for the finished product. You will pick items like the kitchen cabinets, the cabinet hardware, the fixtures, the layout, the style, the paint colors, the counters, etc.
If you are working with a designer, they will most likely ask you some general questions about what works in your current kitchen and what does not, along with what kind of styles you like. They will then take your answers and bring back some different options for you to choose from. If you are not working with an interior designer, you will have to make all those choices and selections on your own. Some contractors will help with the selections and design if needed, so be sure to ask.
Your designer or your contractor will create plans or drawings that will be necessary to visualize the new kitchen, but also that your city or country will require for a building permit application.
As a side note, while you are contemplating disrupting your home for several weeks, consider simultaneously updating a bathroom or other room that you have been wanting to update. Likely, your contractor can complete this work at the same time, without lengthening the entire project. You will only have to endure the upheaval once, and then you are done with it!
Building Permit
After you have figured out your budget and most of the design (small changes to the design can happen later on), you will need to formally hire your contractor. This will allow them to begin working on your behalf.
Depending on the building codes and regulations in your area, you may not require a permit if you are doing only very simple updates. For example, if you are just refinishing cabinets, or if you aren’t moving any electrical or plumbing more than three feet, you may not need a permit. Your contractor will help you determine whether or not a permit is required.
For a full kitchen gut and rebuild, a project of this size will almost certainly require a building permit. To get a permit, your contractor will need to be a licensed contractor.
Your contractor will be responsible for pulling a permit. Your city or country issue permits, and each will have different requirements for them. Typically, the permit application will require a set of plans or drawings for the before and after of a room renovation. There are costs associated with a permit, which should be included in the estimate from your contractor.
The government entity that issues the permit will also conduct inspections at various checkpoints throughout the job. The permit fee may cover these inspections, or there may be additional costs for each inspection.
Kitchen Demolition Day
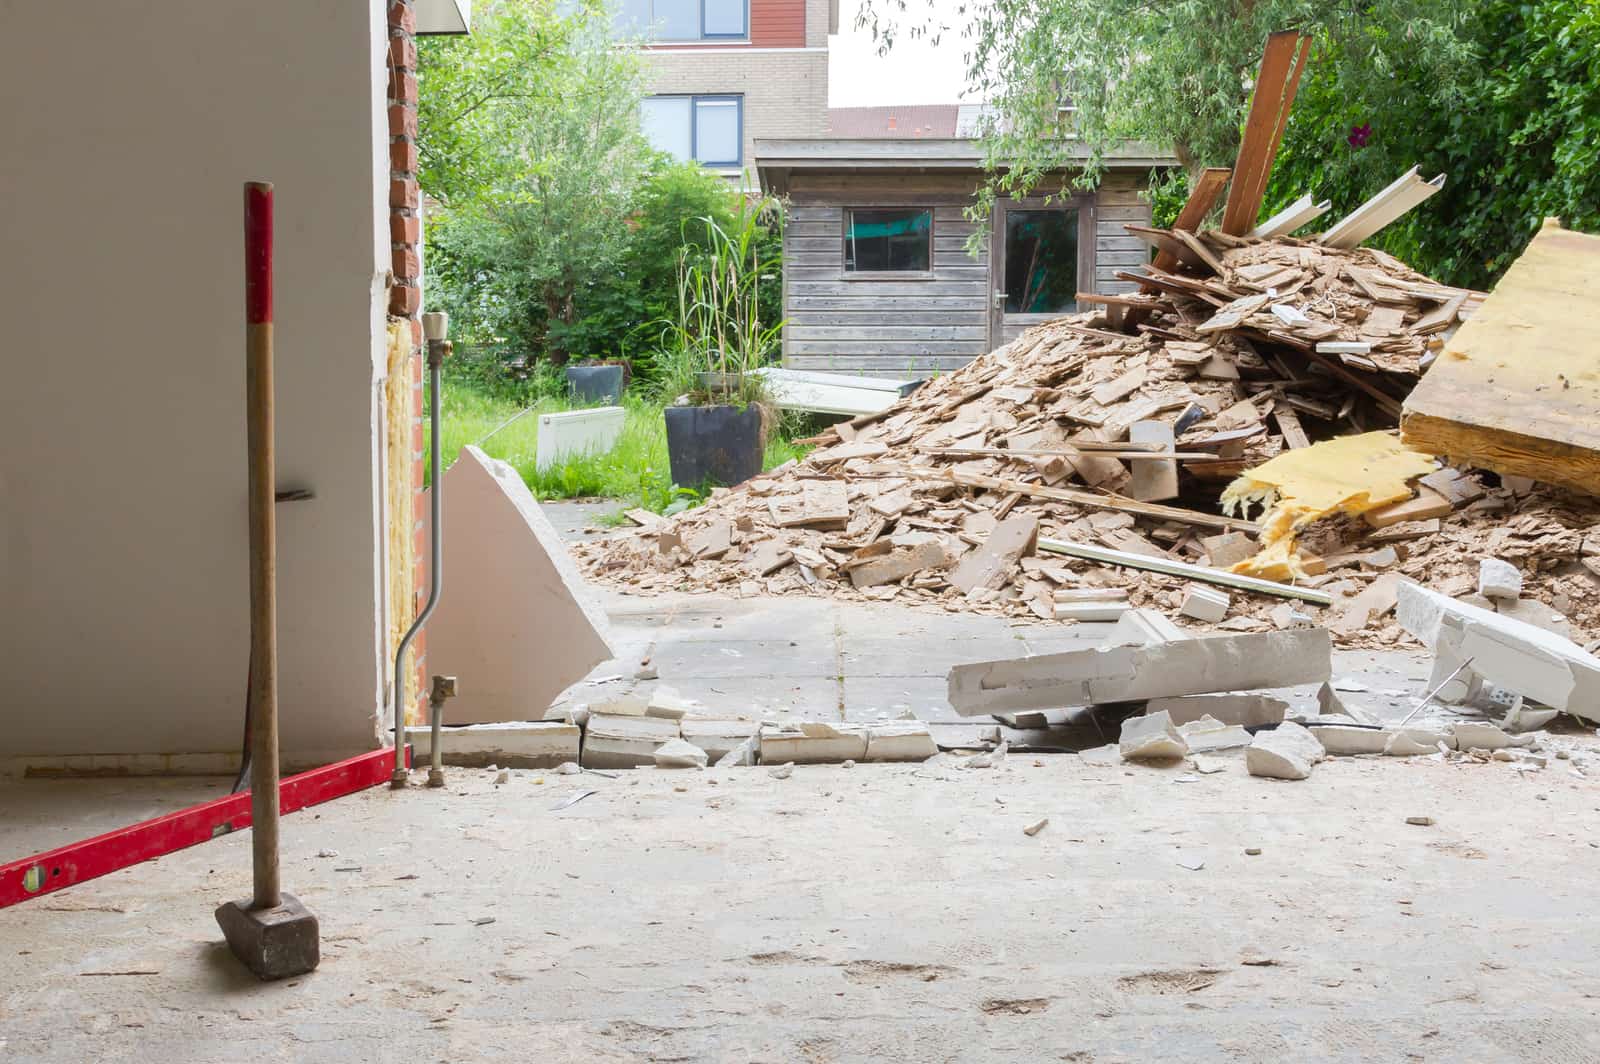
After you receive a permit, it’s time for demolition day. Of the many steps to remodel a kitchen, this is the first where you will see visible progress.
Because you have hired a contractor, all you are responsible for prior to demo is clearing out any of your personal belongings from in the cabinets, in the fridge, on the walls and on the countertops. There is a chance that you will also be responsible for turning off the gas line, the waterline, the electricity, and the appliances, but your contractor will most likely handle all that.
Once you are done clearing your stuff out of your kitchen, you may want to clear out yourself for a couple of reasons. First, when the contractor and his team start the demo, there will be a lot of dirt and dust in the air that you don’t want to breathe in. Second, it can be stressful to see your kitchen torn into pieces, especially if they are taking out walls. There is even a chance that your contractor will require you to leave for insurance and safety reasons.
Demo rarely lasts more than a day, so you will probably only have to be gone for that one day. However, as you will not have a kitchen until the entire project is done, having another place to stay for the duration of the project could be beneficial, though it is understandable if you do not have the finances for that. At a minimum, you will have to arrange alternative ways to cook meals (countertop microwave?), or get lots of delivery, to-go or dine-out meals.
New Walls
This is not a step that every kitchen remodel will have, but if your design includes putting up any new interior walls or partial walls, that will likely be the first thing your contractor does after demo day. They will frame up a wall made out wooden studs. The frame will be covered with drywall later in construction.
If your plans call for expanding the footprint of the house, some exterior work would be necessary. This might involve pouring concrete footings or constructing other supporting framework and floor boards. They will frame up new exterior walls and seal the house against weather. Then your contractor will cut a hole in your old exterior walls and remove them.
If you are adding or updating exterior windows, your contractor may do that at this time.
Update the Plumbing
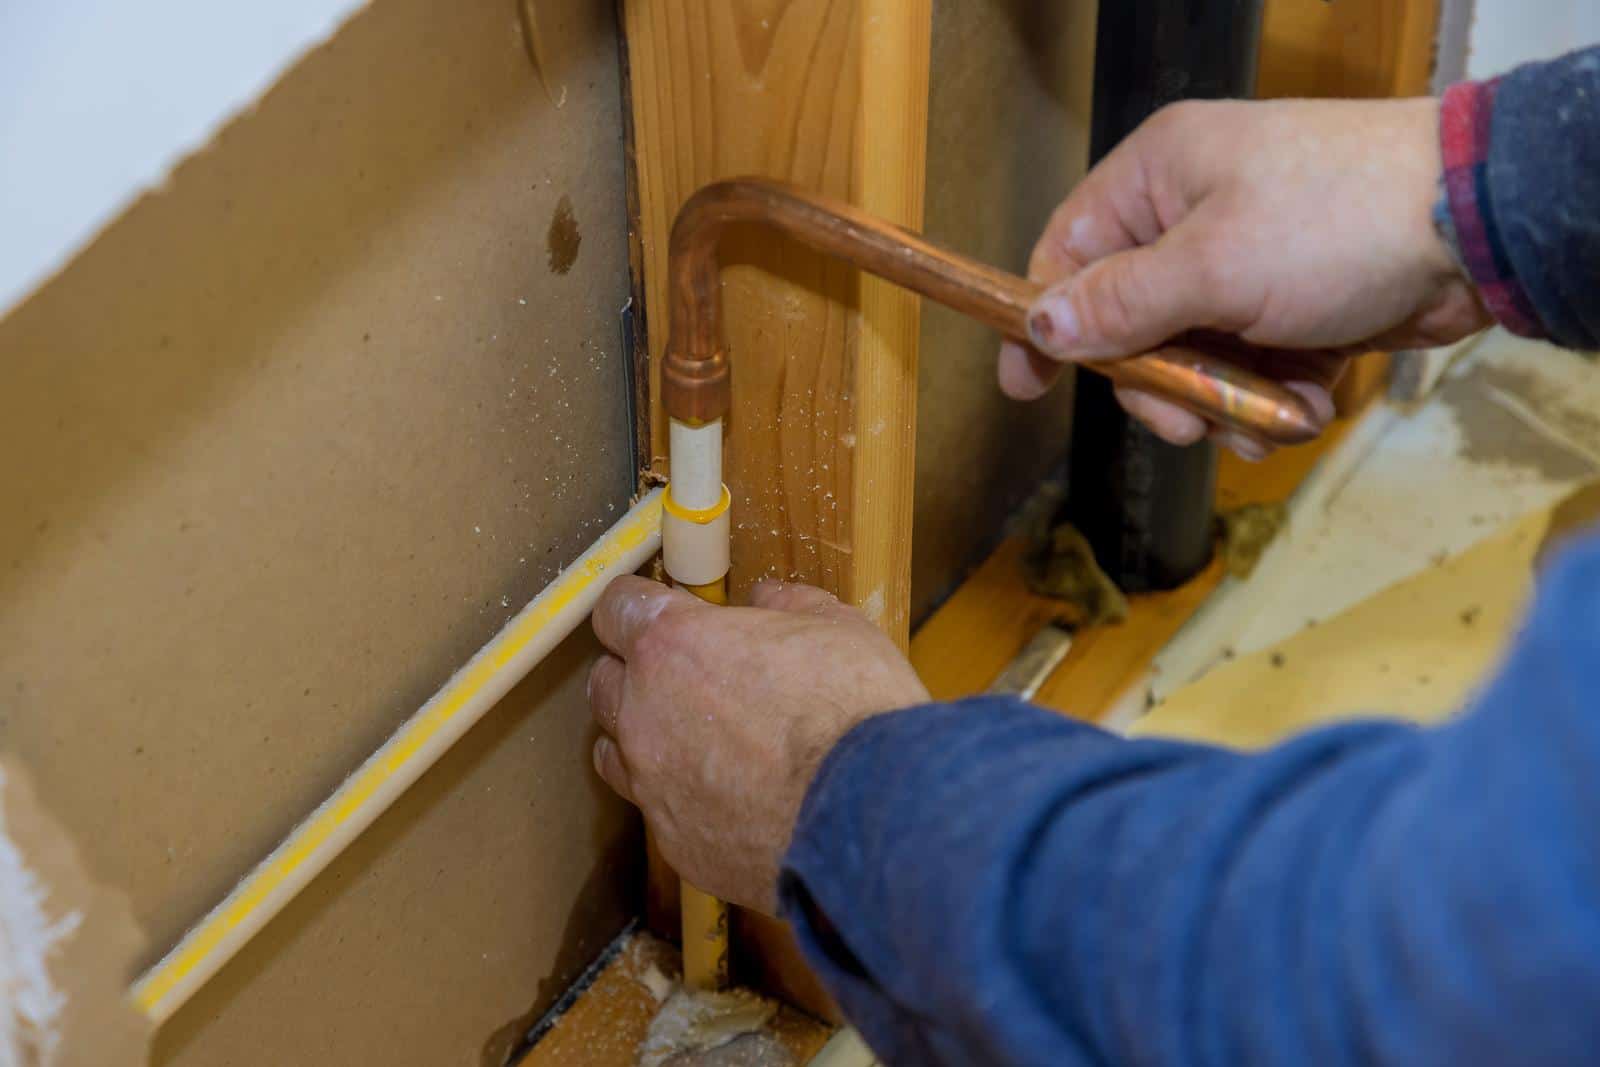
When your kitchen is completely demolished, and the interior walls are broken down to the studs, your contractor will start updating the plumbing and doing the projects that have to be done inside the walls. The industry jargon for this work is “rough-in.” Nice, clean finished fixtures are installed later. Now, the rough, behind-the-scenes and in-the-walls wiring and pipes and other systems go in.
It is not always a requirement to update the plumbing when you are remodeling your kitchen, but there are a couple of scenarios where plumbing definitely will be involved.
First, if any of the plumbing in your kitchen is old, broken, unsafe or not up to code, it is likely that your contractor will require you to update at least some of it. They will require this because it is both safer for you and may be necessary to meet new building code requirements. After plumbing work is done, your contractor will request an inspection from the city or county. The inspector will verify that the new plumbing meets code.
The other reason your Atlanta kitchen remodel may include updating your plumbing is that you request it. This could be because you want to put a sink or some other water feature in a new spot or because you just have a couple of complaints about the current plumbing. Common complaints include low water pressure, no or slow hot water, leaky faucets, new sinks or dishwashers, or the desire to have a new gas line put in to support gas appliances.
Electrical and Lighting Work
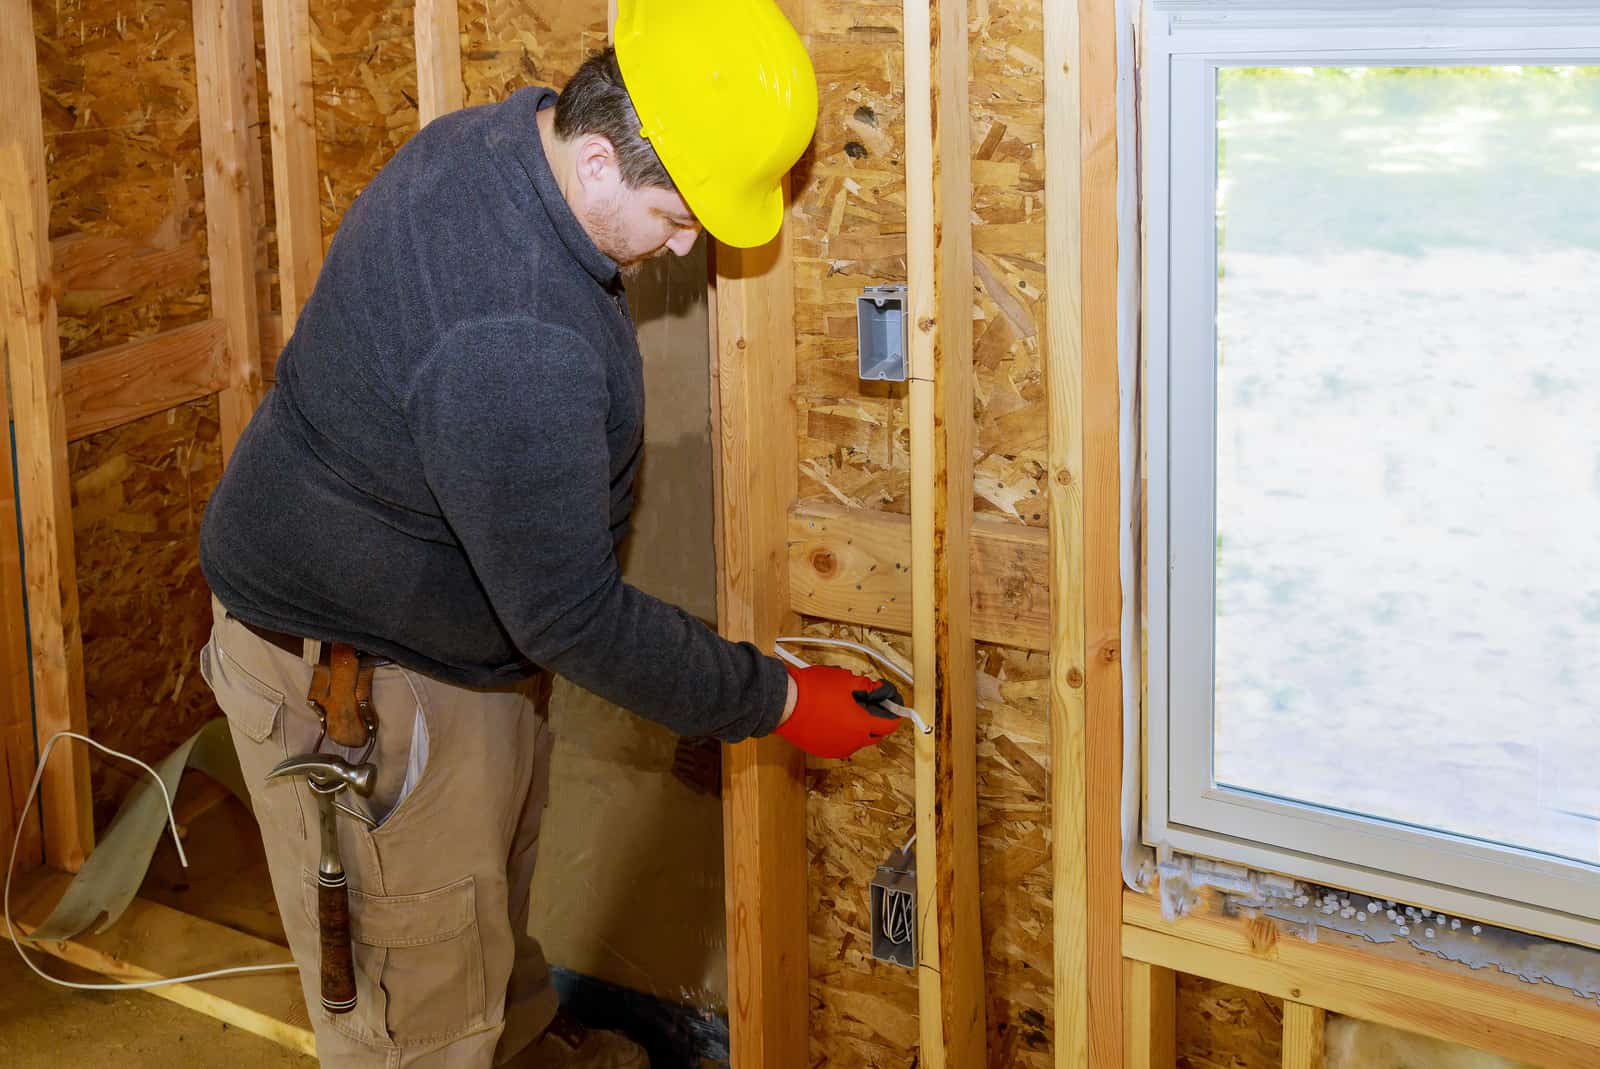
Either after the plumbing for your kitchen is done or at the same time, your contractor will have any electrical and lighting rough-in work completed. He may wait to install any decorative fixtures until a later stage, but any wiring or work that is done in the walls will be done at this point.
With both the electrical wiring and the plumbing work discussed in the previous section, your contractor may hire a subcontractor for the more specialized work. If he does so, the money required to pay the subcontractor should have been included in his original estimate. Your contractor will also have to bring in an inspector to approve electrical wiring. The plumbing and electrical inspection will likely take place at the same time.
If you are not sure what kind of electrical renovations you are interested in for your kitchen, there are some common ones for you to consider: new lighting sources or lighting fixtures, new light switches or dimmer switches including smart switches, wiring for new appliances like a dishwasher, range, or oven, adding more electrical outlets to the walls or to the counters, or adding a garbage disposal.
HVAC
If necessary, heating and cooling vents and piping will go in the walls, floor or ceilings, as appropriate. An entirely new HVAC system likely will not be required, but new vents and ducts will be needed. HVAC inspections are commonly required, so that will be done prior to drywall.
Insulate
After the rough-in work is inspected, but before drywall installation, your contractor will install insulation in exterior walls. Insulation normally requires an inspection, so yet another inspector will come to your home.
Hanging the Drywall

Once all the systems (plumbing, electrical, HVAC, plus insulation) are roughed-in, it is time to close it up and move on to the next part of your kitchen remodel. This is done by hanging drywall over the frame on walls and ceilings.
Installing drywall will require several steps to complete, over a period of several days: hang it, tape it, mud it, let it dry, mud again, let it dry again, sand it and mud a third time, let it dry, sand and add skim coat. Good quality drywall that doesn’t show seams and nails takes time and a skilled installer.
Drywall sanding creates lots of dust, so you want to make sure the parts of your home that are not being renovated are protected from the mess. Your contractor should tape plastic barriers to all openings like doors and keep them in place the entire time they are finishing the drywall.
Doors
Once drywall is completed, your contractor will be able to install any doors that you have added or changed. If you don’t change the layout of your kitchen, you probably won’t be installing new doors.
Painting the Walls

Once the drywall is up and has completely dried, your contractor will start the painting phase of the project. This part is likely to take longer than the hanging of the drywall. A coat of primer will go on first, followed by two coats of paint. A day of drying time is normally required between coats.
Prior to this point, you most likely will have already picked your paint colors. But if you have not or if you want to make any changes, this will be your last chance. If you are working with an interior designer, they will have some recommendations for what works in the space and will fit your aesthetic. On the other hand, if you are picking out the paint colors by yourself and are not sure where to start, consider looking at neutral colors. Neutrals work in almost every single space.
Laying the Flooring
Both the walls and the floors have to be completely finished before you can start installing cabinetry or bringing in the appliances. Since the walls are done when the painting is done, now it will be time to lay the flooring.
When it comes to flooring, you have a lot of different options. Different kinds of kitchen floor options include: linoleum, laminate, hardwood, concrete, and ceramic tiles. Each different kind of material has its own pros and cons. For example, linoleum is inexpensive to put in but scratches easily and has a low resale value. On the other hand, hardwood floors are more expensive to put in, but they are much more durable and have a really high resale value.
Different flooring options require different amounts of time for installation. Some may go in during a single day, while others such as hardwoods require several steps for installation, sanding, staining, drying and coating.
Install the Cabinetry
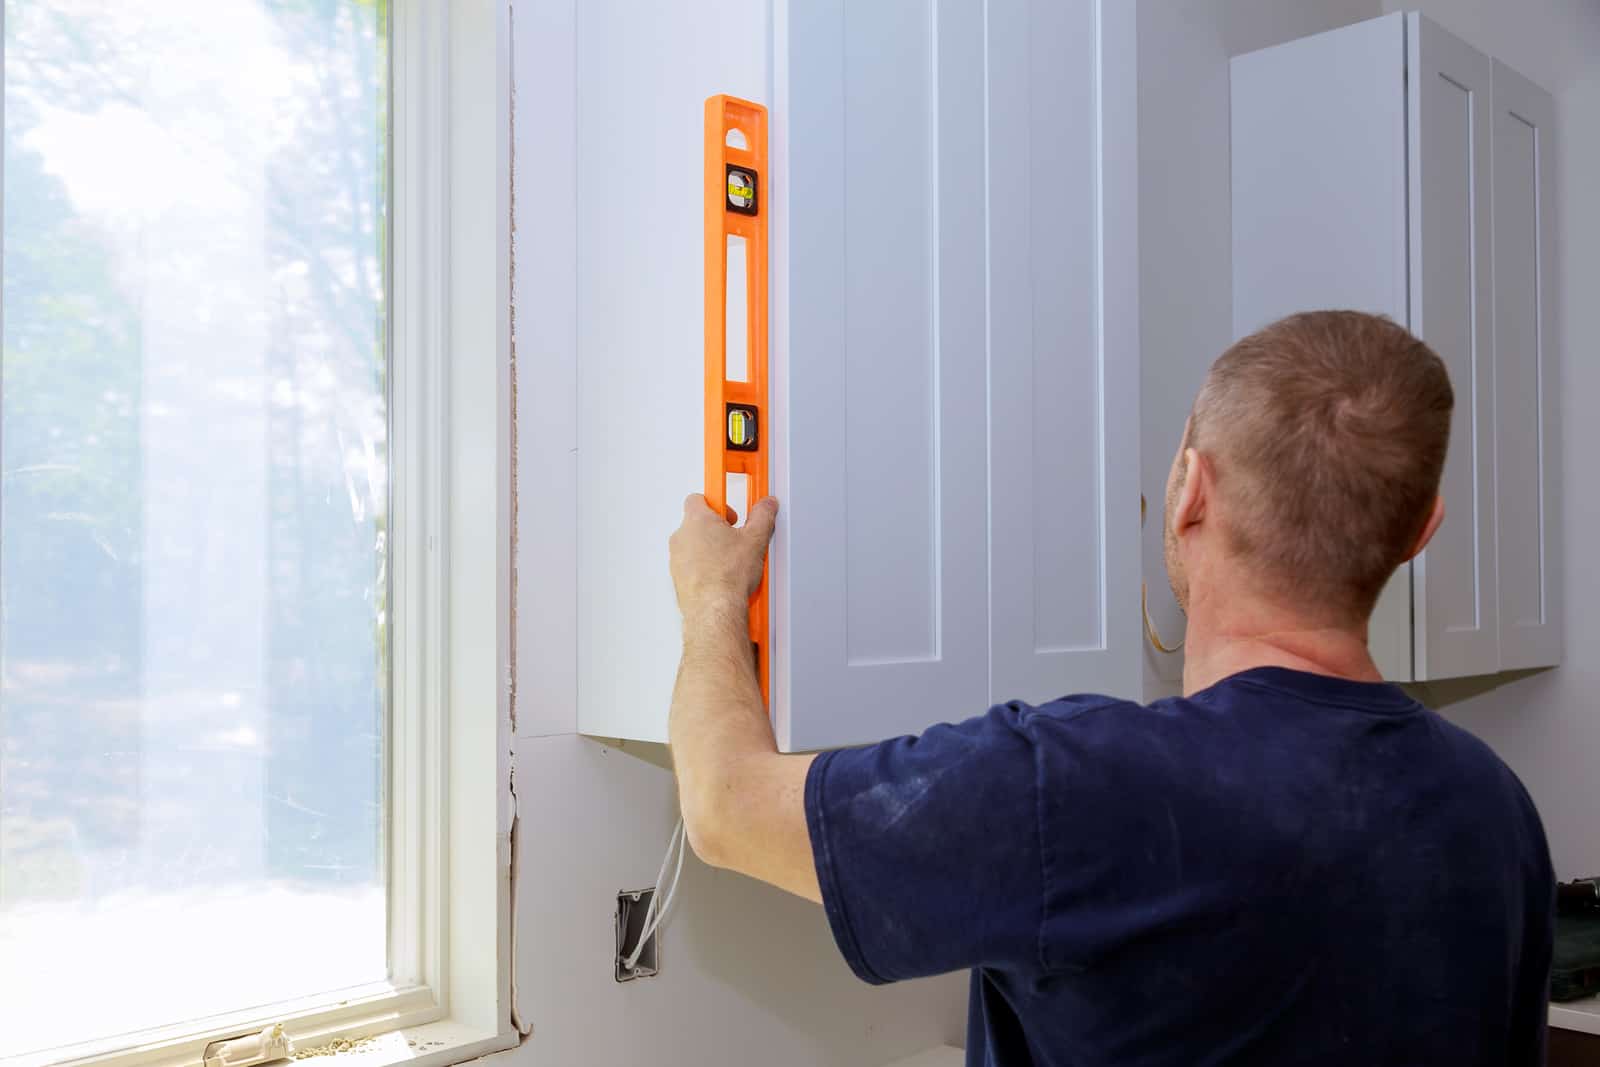
Once the walls and the floors are completed, it is time to install the kitchen cabinets. Properly installed cabinetry is a really important part of the process for the overall look of your kitchen and the safety of both you and your dishes. However, you do still have a range of choices as far as the quality of your cabinets.
Many people, when remodeling their kitchens, prefer to get custom cabinets because they allow you to get exactly the kind of storage you want and ensure that it fits your space perfectly. However, custom cabinets can be really expensive, so you may prefer to get a more standardized set shipped in. Make sure you include your contractor in this decision because some contractors will only install custom cabinets while others may prefer standardized ones. Of course, no matter what kind you pick, you get to choose the color and general style you like.
The cabinets may be painted at the factory or on-site after installation.
Place the Countertops
Once the cabinets are done, your contractor will bring in and place the countertops. Note that there might be a pause at this point in the process because some contractors prefer to wait to measure for the countertops until after the cabinets are installed. That means that there will be a waiting period between the cabinet installation and when the countertops are cut and are brought in. You can help reduce this wait by choosing the kind of countertops you want ahead of time. And you can even select the specific slab for your project well in advance of installation.
You will need to choose your sink prior to the fabrication of the countertops since a cut must be made to accommodate the sink.
There are several countertop materials that you can choose from, including granite, quartz, laminate, concrete, and butcher block. Of course, the kind you can have may be limited by your budget and the amount of weight that your cabinets can support.
Your contractor may also put in the sink at this time, but he will likely wait to install the sink and faucet until he is installing the rest of the plumbing fixtures.
Install Fixtures
Earlier, the rough-in work paved the way for installation of new plumbing and lighting fixtures. Your contractor will now install your beautiful new chandelier or pendant lights, sink, faucet and other fixtures.
Hang the Backsplash
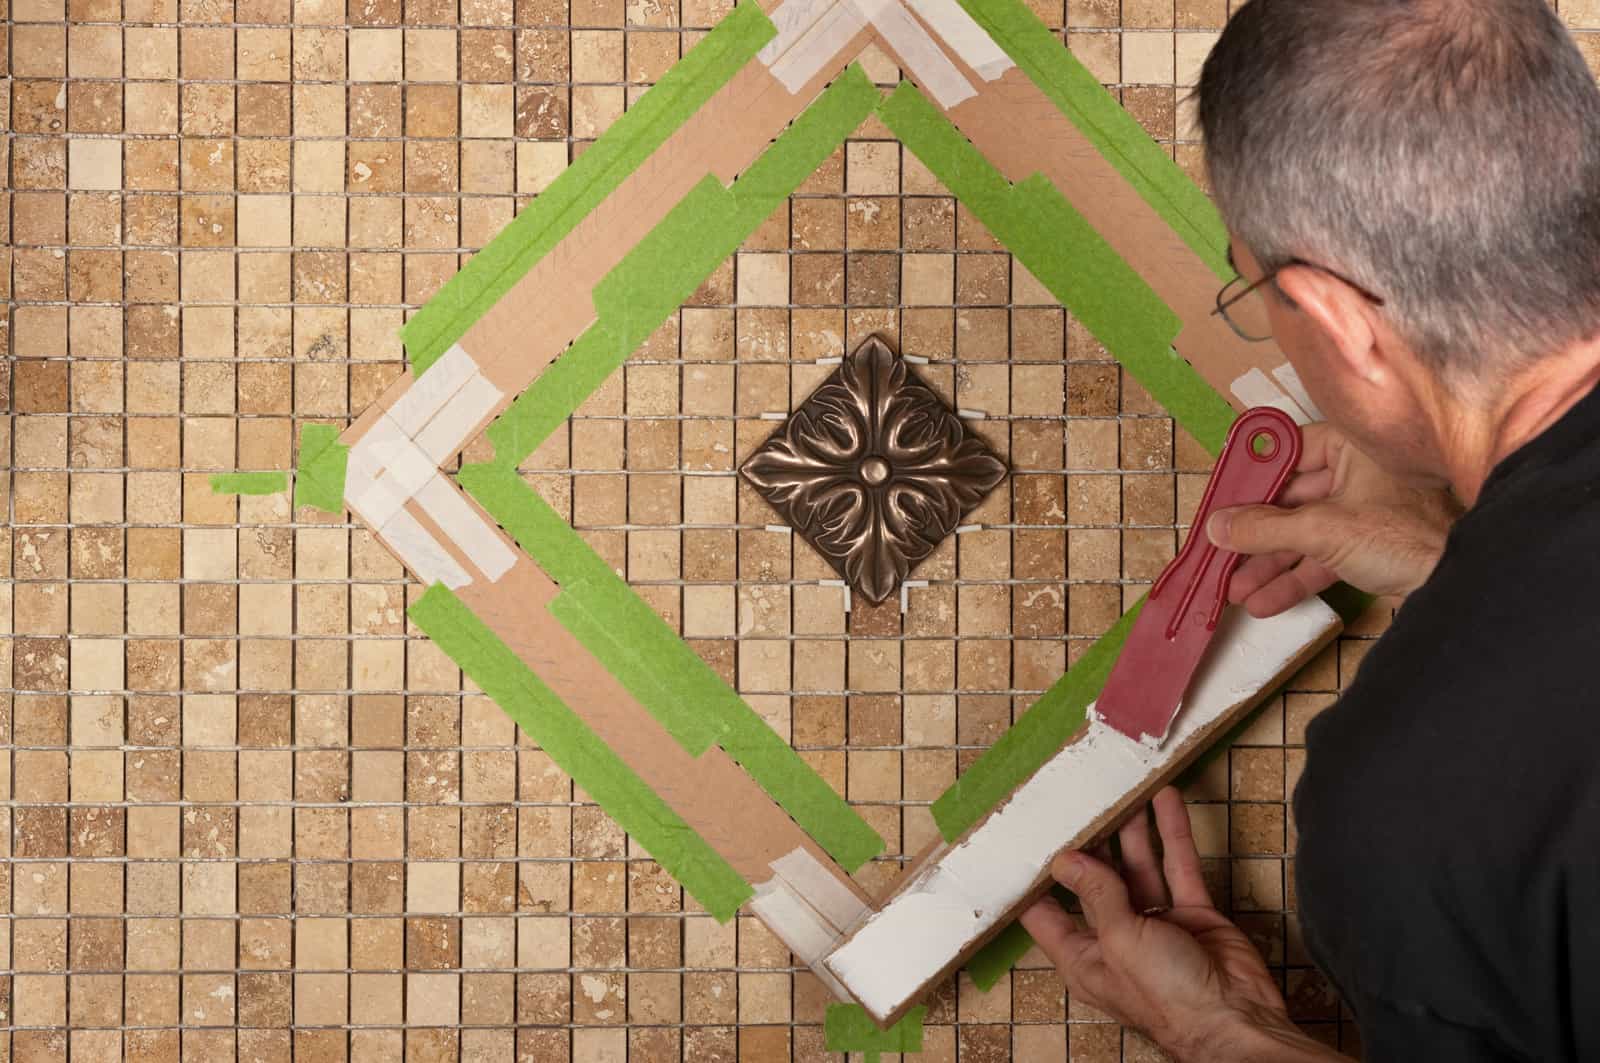
When your contractor starts to put up the backsplash, you can be assured that your dream kitchen is nearly complete! Of course, the amount of time it takes to install a backsplash depends on the kind you get. A tile backsplash will take a lot longer than one you can hang in one piece. However, no matter what kind of backsplash you get, it should not take all that long.
Having the backsplash hung will really help your kitchen start to feel put together, and you will start to see what all the money you are investing in this project has accomplished.
Final Inspection
Although a few items remain to be completed, the city or county inspector can perform their final inspection. Assuming they are satisfied, they will sign-off on the permit.
While the legal requirements are met, there are a few things left to do.
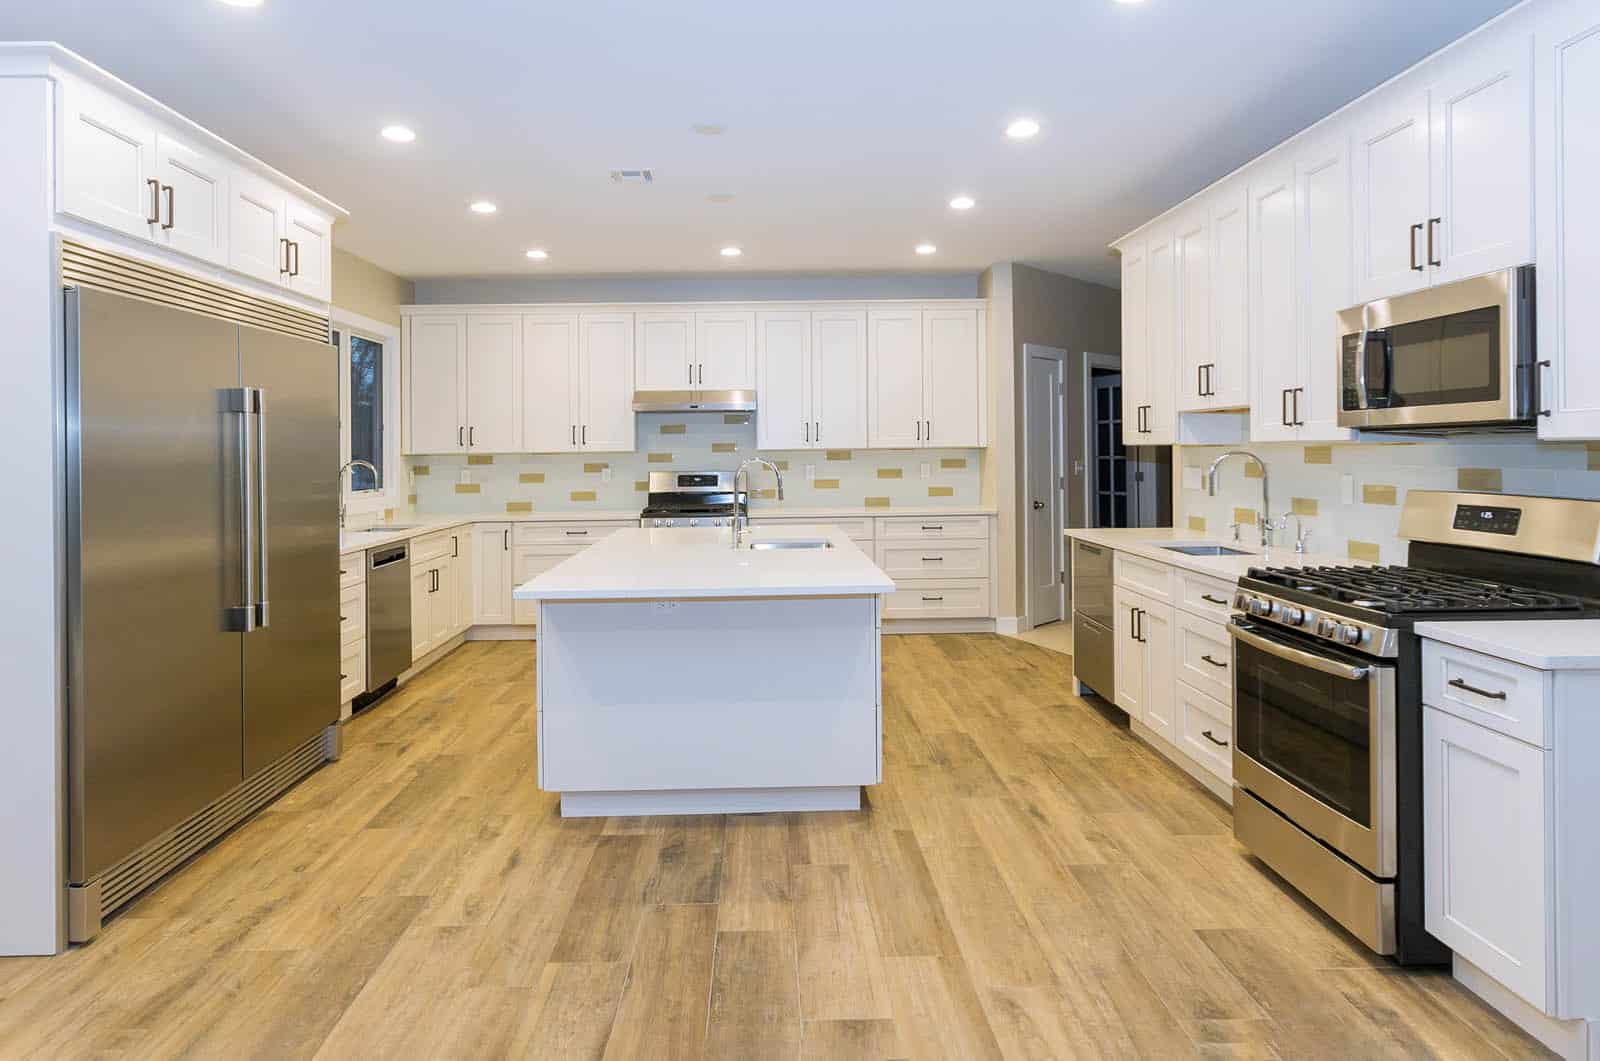
Appliances and Finishing Touches
Now all the major remodeling is done, and it’s finally time for the last couple of steps. Your contractor will bring in all of your appliances and set them up. Some people choose to use their old appliances, which makes this process really quick and easy. But more often than not, people get new appliances. Your contractor will connect appliances to any water, electricity, etc., that it needs and ensure everything is running smoothly.
There are a couple of other things that will happen at this point. If there are any paint touch-ups that need to be done, your contractor will do it at this point. The contractor will also finish with any cleanup work. If you are working with an interior designer, they will often come in at this time. They will put in any finishing design touches and maybe even put away your stuff in your new cabinets. If you do not have an interior designer, you may want to spend a little extra money to have someone move your stuff back in.
Your new kitchen is complete and you can start enjoying it. It’s time to celebrate! So, do you go out to dinner for a big celebratory meal, or stay in and cook on your new stove?
Either way, you made it through these many steps to remodel a kitchen and through the short-term inconvenience and can enjoy your new kitchen for years to come!
When you are ready to renovate your kitchen in Atlanta, contact Halcyon Remodeling for a free estimate. Your dream kitchen can be a reality! Let us turn your ideas into a brand new kitchen.
Halcyon Remodeling also renovates and builds basements, bathrooms, decks, outdoor living areas, and even performs fire damage restoration.